Showing posts with label to. Show all posts
Showing posts with label to. Show all posts
Tuesday, April 14, 2015
Samsung Galaxy Note 3 SM N9007 How to Install N9007ZHUANB1 Android 4 3 Jelly Bean Firmware
Samsung Galaxy Note 3 SM-N9007- How to Install N9007ZHUANB1 Android 4.3 Jelly Bean Firmware,N9007ZHUANB1 Android 4.3 Jelly Bean Firmware Last Updated on 27-Feb-2014. Samsung Galaxy Note 3 SM-N9007 users can now update their device with the latest ZHUANB1 Android 4.3 Jelly Bean official firmware. Samsung recently started rolling out an OTA update about the firmware. The latest firmware build version is N9007ZHUANB1. The Galaxy Note 3 was released with the Android 4.3 Jelly Bean and started receiving firmware update soon after the release. Samsung already released firmware update for the device and here we have the latest available firmware for the device. If you own the device and yet to update your device to this latest firmware, then update the same using our simple tutorial below. The below guide will help you to download and install the N9007ZHUANB1 Android 4.3 Jelly Bean firmware manually through Odin.
 As the Samsung Galaxy Note 3 N9007 already running with Android 4.3 Jelly Bean, you can only expect few bug fixes and performance enhancement with this latest update. It is always recommended to update your device to the latest firmware whenever available.If you don’t know, the Android 4.3 Jelly Bean comes with many new features than the previous Android 4.2.2 Jelly Bean such as- Multi-pages feature on lockscreen, support widget on lockscreen, Tabbed UI in Settings, Daydream feature, Voice control feature for apps like phone, camera, music player and so on, Hands-free Mode, New Notification Panel with 2 pages, ANT+ support, TRIM support, Camera Improvements, Move apps to SD feature, New Samsung keyboard, Changed icons for some Samsung apps, Smoother TouchWiz, Adapt display, Adapt sound, Full screen mode in Samsung apps and many more.
So, want to update your Galaxy Note 3 N9007 to the latest ZHUANB1 Android 4.3 Jelly Bean firmware? There are two official way to update the firmware, either check and update via OTA (over the air) from your phone settings, go to Settings-General-About-Software Update or download and update through the Samsung Kies utility. However, if you are looking for a manual way to update the latest Android 4.3 ZHUANB1 firmware on your Galaxy Note 3 N9007 via Odin, then follow this step by step tutorial.


So, want to update your Galaxy Note 3 N9007 to the latest ZHUANB1 Android 4.3 Jelly Bean firmware? There are two official way to update the firmware, either check and update via OTA (over the air) from your phone settings, go to Settings-General-About-Software Update or download and update through the Samsung Kies utility. However, if you are looking for a manual way to update the latest Android 4.3 ZHUANB1 firmware on your Galaxy Note 3 N9007 via Odin, then follow this step by step tutorial.
Important Note:
“The firmware is released only for the Samsung Galaxy Note 3 SM-N9007 model, so don’t try this in any other android device. Check your device model number from Settings-General-About. Also the tutorial is based on Windows PC. Follow all the pre-requisites, procedures and steps carefully to avoid breaking your phone”.
Android 4.3 Jelly Bean N9007ZHUANB1 Official Firmware Download List
Samsung rolled out the firmware for the following countries. The firmware which are unbranded or not locked to any carrier, no matter of which country or region, can be flashed on any Galaxy Note 3 SM-N9007 model.
Hong Kong: TGY-N9007ZHUANB1-20140225121322.zip | Link2
Previous Firmware Build:
Samsung Galaxy Note 3 SM-N9005- Simple Tutorial How To Root N9005ZTUDMK2 Android 4.3 JB Stock Firmware Running
Pre-Requisites:
- Check battery percentage, your device should have at least 60% battery power
- Turn on USB Debugging mode, go to Settings-General-Developer Options (As the Developer options are hidden by default on all Android device running on Android 4.2 or up, So go to Settings-General-About on your Galaxy Note 3 and tap Build Number for 7 times to visible the Developer options.) See the image above
- Backup important data and settings to external storage- follow this guide
- Install USB driver for your device on your computer- Download Samsung USB Driver
Points to be noted:
- If you are using any Custom ROM such as- CyanogenMod, Paranoid Android, AOKP, SLIM ROMs etc, then it’ll replaced by this official Stock ROM
- Custom Recovery (CWM or TWRP Recovery) will be replaced by Stock Recovery
- After flashing official firmware, your device will no longer belongs to rooted device. However you can root your device any time after flashing the firmware.
How to Update Android 4.3 Jelly Bean Official Firmware on Galaxy Note 3 N9007 via Odin:
- Download Android 4.3 ZHUANB1 Firmware for Galaxy Note 3 N9007 from the above list
- Download Odin 3.09
- Switch off your phone and boot Galaxy Note 3 N9007 into Download Mode by pressing and holding the Volume Down+Home+Power buttons (long press until the boot screen appear), now press Volume Up key to proceed to Download Mode.
- Extract the downloaded Odin3.07 zip file and run the Odin3 v3.07.exe file as an administrator (Right click on the .exe file and click on Run as administrator)
- Now connect your Galaxy Note 3 N9007 to your computer via USB cable
- In Odin3 screen, you should see a COM Port number like “0:[COM7]” at ID:COM section and “Added!” text at the message box. This means your device has been detected by Odin3.
- Make sure that, only the “Auto Reboot” and “F. Reset Time” options are checked.
- Now, extract the downloaded firmware zip file, you’ll find a firmware file with extension .tar.md5
- In Odin screen, click on PDA button and select the firmware file with .tar.md5 extension (The firmware file look something like: N9007XXDLJ5_N9007ODDDLI7_INU.tar.md5)
- Now, click on the Start button to begin the installation process, wait few moments.
- Once completed, you would see “PASS!” message in ID:COM port having green background
- Your phone should automatically reboot after completion
- You can now disconnect your phone from computer
- Finish
Thursday, April 9, 2015
Samsung Galaxy Note 3 SM N900 How to Install N900XXUDNB2 Android 4 4 2 KitKat Firmware
Samsung Galaxy Note 3 SM-N900- How to Install N900XXUDNB2 Android 4.4.2 KitKat Firmwar,N900XXUDNB2 Android 4.4.2 KitKat Firmware Last Updated on 25-Feb-2014. You can now update the latest XXUDNB2 4.4.2 KitKat official firmware on Samsung Galaxy Note 3 SM-N900. Samsung recently started rolling out an OTA update about the firmware. The latest firmware build version is N900XXUDNB2. However, the firmware is currently released for Russia. Hope the firmware will hit other part of the world soon. The Galaxy Note 3 was released with Android 4.3 Jelly Bean and started received firmware update soon after the release. The device already get KitKat firmware update and here we have the latest official Android 4.4.2 KitKat firmware. If you own the device and yet to update this latest firmware, then update the same using our simple tutorial below. The below guide will help you to download and install the N900XXUDNB2 Android 4.4.2 KitKat Firmware manually through Odin.

So, want to update your Galaxy Note 3 N900 to the latest XXUDNB2 Android 4.4.2 KitKat firmware? There are two official way to update the firmware, either check and update via OTA (over the air) from your phone settings, go to Settings-General-About-Software Update or download and update through the Samsung Kies utility. However, if you are looking for a manual way to update the latest Android 4.4.2 XXUDNB2 firmware on your Galaxy Note 3 N900 via Odin, then follow this step by step tutorial.

Root N900XXUDNB2
Samsung Galaxy Note 3 SM-N900- Simple Tutorial Root N900XXUCMK2 Android 4.3 Jelly Bean Firmware
Android 4.4.2 KitKat is definitely a great update for the Samsung Galaxy Note 3 N900 users as they are eagerly waiting for great features that coming with this latest update.
Android 4.4.2 KitKat comes with many new features than the previous Android 4.3 Jelly Bean, some includes- Camera shortcut on lockscreen, White icons in status bar, Performance improvements, Transparent status bar, Improved keyboard layout in landscape orientation, Select between the stock messaging app or Hangouts for SMS and MMS, Select between TouchWiz or other launchers through settings, Wireless printing, Updated Google apps and many more.So, want to update your Galaxy Note 3 N900 to the latest XXUDNB2 Android 4.4.2 KitKat firmware? There are two official way to update the firmware, either check and update via OTA (over the air) from your phone settings, go to Settings-General-About-Software Update or download and update through the Samsung Kies utility. However, if you are looking for a manual way to update the latest Android 4.4.2 XXUDNB2 firmware on your Galaxy Note 3 N900 via Odin, then follow this step by step tutorial.
Important Note:
“The firmware is released only for the Samsung Galaxy Note 3 SM-N900 model, so don’t try this in any other android device. Check your device model number from Settings-General-About. Also the tutorial is based on Windows PC. Follow all the pre-requisites, procedures and steps carefully to avoid breaking your phone”.
Android 4.4.2 KitKat N900XXUDNB2 Official Firmware Download List
Samsung rolled out the firmware for the following countries. The firmware which are unbranded or not locked to any carrier, no matter of which country or region, can be flashed on any Galaxy Note 3 SM-N900 model.
Russia (MegaFon): N900XXUDNB2_N900MGFDNB3_MGF.zip
Russia: N900XXUDNB2_N900SERDNB2_SER.zip | Link2
Kazakhstan: N900XXUDNB2_N900OXEDNB2_SKZ.zip | Link2
Ukraine (Kyivstar): N900XXUDNB2_N900OXEDNB2_SEK.zip | Link2
Russia: N900XXUDNB2_N900SERDNB2_SER.zip | Link2
Kazakhstan: N900XXUDNB2_N900OXEDNB2_SKZ.zip | Link2
Ukraine (Kyivstar): N900XXUDNB2_N900OXEDNB2_SEK.zip | Link2
[Firmware for rest of the countries will be added here when available]
Samsung Galaxy S4 GT-I9500- Simple Tutorial How to Root I9500 Android 4.4.2 KitKat Firmware
Samsung GT-I9500 Android 4.4.2 KitKat Firmware working firmware download now.
Samsung Galaxy Note 3 SM-N900- How to Install N900XXUDNA6 Android 4.4.2 KitKat Firmware.
Previous Firmware Build
Samsung Galaxy S4 GT-I9500- How to Install I9500XXUFNB3 Android 4.4.2 KitKat FirmwareSamsung Galaxy S4 GT-I9500- Simple Tutorial How to Root I9500 Android 4.4.2 KitKat Firmware
Samsung GT-I9500 Android 4.4.2 KitKat Firmware working firmware download now.
Samsung Galaxy Note 3 SM-N900- How to Install N900XXUDNA6 Android 4.4.2 KitKat Firmware.
Pre-Requisites:
- Check battery percentage, your device should have at least 60% battery power
- Turn on USB Debugging mode, go to Settings-General-Developer Options (As the Developer options are hidden by default on all Android device running on Android 4.2 or up, So go to Settings-General-About on your Galaxy Note 3 and tap Build Number for 7 times to visible the Developer options.) See the image above
- Backup important data and settings to external storage- follow this guide
- Install USB driver for your device on your computer- Download Samsung USB Driver
Points to be noted:
- If you are using any Custom ROM such as- CyanogenMod, Paranoid Android, AOKP, SLIM ROMs etc, then it’ll replaced by this official Stock ROM
- Custom Recovery (CWM or TWRP Recovery) will be replaced by Stock Recovery
- After flashing official firmware, your device will no longer belongs to rooted device. However you can root your device any time after flashing the firmware.
How to Update Android 4.4.2 KitKat Official Firmware on Galaxy Note 3 N900 via Odin:
- Download Android 4.4.2 XXUDNB2 Firmware for Galaxy Note 3 N900 from the above list
- Download Odin 3.09
- Switch off your phone and boot Galaxy Note 3 N900 into Download Mode by pressing and holding the Volume Down+Home+Power buttons (long press until the boot screen appear), now press Volume Up key to proceed to Download Mode.
- Extract the downloaded Odin3.09 zip file and run the Odin3 v3.09.exe file as an administrator (Right click on the .exe file and click on Run as administrator)
- Now connect your Galaxy Note 3 N900 to your computer via USB cable
- In Odin3 screen, you should see a COM Port number like “0:[COM7]” at ID:COM section and “Added!” text at the message box. This means your device has been detected by Odin3.
- Make sure that, only the “Auto Reboot” and “F. Reset Time” options are checked.
- Now, extract the downloaded firmware zip file, you’ll find a firmware file with extension .tar.md5
- In Odin screen, click on AP button and select the firmware file with .tar.md5 extension (The firmware file look something like: N900XXDLJ5_N900ODDDLI7_INU.tar.md5)
- Now, click on the Start button to begin the installation process, wait few moments.
- Once completed, you would see “PASS!” message in ID:COM port having green background
- Your phone should automatically reboot after completion
- You can now disconnect your phone from computer
- Finish
Tuesday, April 7, 2015
Nokia 7230 Device Not Detected on USB to PC connection
This solution may work and can be applied if Nokia 7230 does not detected if being plug-in to a personal computer. This solution shows the particular components that needs to check or replace if the device handset is not detected over the USB.
 Check all the components showed on the solution above it is labeled according were to begin with.
Nokia 7230 Device Not detected on USB to PC connection

Friday, March 6, 2015
How to add Favicon to Blogger Blog
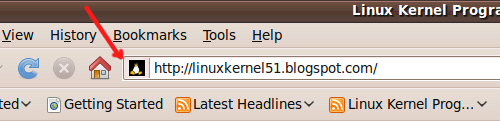
Favicon is a small icon(image) displayed at the beginning of the address bar of the browser.It is also called Favourite Icon,Pageicon and urlicon.
The main advantage of creating and using favicon is ,it makes it easy to find your blog or site when someone favourited or bookmarked your site/blog among several other sites. Here in the below image arrow point to favicon.
 Most of the people use 16*16 pixel favicon(you can also use 32*32 pixel favicon) with ".ico" format.But,you can also use gif,png(image formats) as well.
Step1: First you need to generate the favicon, that is ".ioc" file by using a favicon generator tool, it is simple in 3 steps.
Step2: The generated favicon should be hosted by some servers, there are many servers available for free hosting. below i have provided link for a generator and hosting site.
Step3: The generated HTML code has to be pasted in blog templet to display your personal favicon.
The main advantage of creating and using favicon is ,it makes it easy to find your blog or site when someone favourited or bookmarked your site/blog among several other sites. Here in the below image arrow point to favicon.
Step1: First you need to generate the favicon, that is ".ioc" file by using a favicon generator tool, it is simple in 3 steps.
Step2: The generated favicon should be hosted by some servers, there are many servers available for free hosting. below i have provided link for a generator and hosting site.
Step3: The generated HTML code has to be pasted in blog templet to display your personal favicon.
Link to: Favicon Generator and Hosting
Step4: Now,go to your blogger dashboard>layout>Edit html [look at the below screenshots]
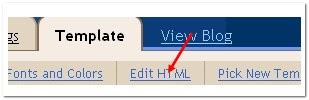
and look for this code(it is at the top the template)
<title><data:blog.pagetitle/></title><b:skin><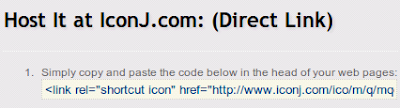
Related Posts:
- How to Remove NavBar in Blogger Blog.
- How to Refresh the Blog Automatically.
- How To Add “Select all” Html Box to Your Blogger Post.
Sunday, February 8, 2015
How to save your apps to APK
How to save my apps to APK file format?


Now you can copy it and give it to your friends that cant download it from android market due to country limitation or back-up it into your PC for future use (You dont have to download it again from the market. Just update it if there are new version)
Enjoy!
Read more »
- Download File Expert from android market. Its FREE
- Run File Expert

- Go to App Tab. You may select application you like to backup/save to APK file format. Click [Backup].

- All your APK file will be saved to "/mnt/sdcard/backup_apps".
Now you can copy it and give it to your friends that cant download it from android market due to country limitation or back-up it into your PC for future use (You dont have to download it again from the market. Just update it if there are new version)
Enjoy!
Saturday, February 7, 2015
Android Fever Page JavaScript Updated to cater Chrome Firefox and IE
Microsoft Internet Explorer is the most annoying related to Java script. The page really miss alignment and the script not working as I wanted to or as you seen on Chrome.
Alhamdulillah. I managed to fix the script and tested it works on MS IE, Firefox and Chrome. Previously, Im using Chrome only to develop and test it. But some of my blog visitors complaint about the visibility. Thanks for the comment.
My blog should look like this.
 Google Chrome
 Mozilla Firefox

Microsoft Internet Explorer
The mystery end.
Read more »
Alhamdulillah. I managed to fix the script and tested it works on MS IE, Firefox and Chrome. Previously, Im using Chrome only to develop and test it. But some of my blog visitors complaint about the visibility. Thanks for the comment.
My blog should look like this.


Microsoft Internet Explorer
The mystery end.
Tuesday, February 3, 2015
How to Install I9000 Value Pack
How to Install Android 2.3.6 Gingerbread Value Pack on Samsung Galaxy S GT-I9000
A leaked Android 2.3.6 Gingerbread Value Pack firmware from Samsung lets you enjoy neat features, such as Face Unlock of the Galaxy Nexus, and improves the mobile phone’s performance.
This leaked Value Pack firmware build XXJVU update includes the following:
1. Extract the Value Pack ZIP update files to your desktop. The file should include the following files:
3. Turn off your Galaxy S and reboot it into download mode (Volume Down+Home+Power button)
4. Connect your phone to your PC via USB cable.
5. Once connected, wait for Odin’s ID:COM box to turn yellow, signaling that the device has been detected.
6. Manually add the files in their respective places in Odin3:
Read more »
A leaked Android 2.3.6 Gingerbread Value Pack firmware from Samsung lets you enjoy neat features, such as Face Unlock of the Galaxy Nexus, and improves the mobile phone’s performance.
This leaked Value Pack firmware build XXJVU update includes the following:
- Face Unlock from Galaxy Nexus
- Galaxy Note Lockscreen
- Galaxy S2 Photo Editor
- Improved Camera App
- Ability to take picture while taking videos
- Fast auto-rotation response
- New Lockscreen sounds
- Enhanced stock browser
- Smoother and faster Gallery 3D
- Higher FPS rate in 3D
- Minor changes in the UI
Requirements
The leaked ROM for the Android 2.3.6 Gingerbread Value Pack build XXJVU hasn’t been thoroughly tested, so it may not be suitable for use daily. If you want to check out what the ROM has in store for you, you can try flashing it to your Galaxy S. But, take note of the following requirements and important reminders:- Download Odin3 v1.83
- Download leaked Android 2.3.6 Gingerbread Value Pack
- Create a backup of your phone data, settings, and important files.
- Disable/Kill Samsung KIES process from task manager. These could interfere during the installation process.
- Make sure your phone has at least 60% power.
- Update your device at your own risk. We are not liable for any damage arising from your use of this guide.
How to install
If you’re all set and ready to go, you may install Android 2.3.6 Gingerbread Value Pack into your Samsung Galaxy S by following these steps:1. Extract the Value Pack ZIP update files to your desktop. The file should include the following files:
- CODE_I9000XXJVU_CL851880_REV03_user_low_ship.tar.md5
- MODEM_I9000XXJVU_REV_00_CL1092175.tar.md5
- GT-I9000-CSC-MULTI-OXAJVU.tar.md5.
3. Turn off your Galaxy S and reboot it into download mode (Volume Down+Home+Power button)
4. Connect your phone to your PC via USB cable.
5. Once connected, wait for Odin’s ID:COM box to turn yellow, signaling that the device has been detected.
6. Manually add the files in their respective places in Odin3:
- PDA: CODE_I9000XXJVU_CL851880_REV03_user_low_ship.tar.md5
- PHONE: MODEM_I9000XXJVU_REV_00_CL1092175.tar.md5
- CSC: GT-I9000-CSC-MULTI-OXAJVU.tar.md5
Subscribe to:
Posts (Atom)